Upscaled to 300 DPI is not 300 DPI
The number on the file goes up. The detail in the print does not.
Upscaling makes a file bigger by inventing pixels between the ones it has. Afterwards the file measures 300 DPI, but it carries only the detail of the file you started with: a 1,200-pixel design stretched to 3,600 pixels is "300 DPI at 12 inches" with 100 DPI worth of detail. Ordinary upscaling spreads that detail out, so edges go soft. AI upscaling predicts new detail to fill the gaps, which can look sharper, but it is a guess. If your design came from Canva, you can usually skip both and simply export bigger.
What the 300 is counting
Real print resolution is pixel width divided by printed width in inches — the 96 DPI article walks through it. That is exactly why upscaling is tempting: add pixels and the division comes out at 300. But the division only counts pixels. It cannot tell an original pixel from an invented one.
Upscale any of these to 3,600 pixels wide and the result is labelled 300 DPI at 12 inches. Here is the detail each starting file actually carries at that size:
| Started as | Real detail at 12 inches wide |
|---|---|
| 1,200 px wide | 100 DPI |
| 1,800 px wide | 150 DPI |
| 2,400 px wide | 200 DPI |
| 3,600 px wide | 300 DPI |
What ordinary upscaling does
Ordinary upscaling — bicubic, Lanczos, or whatever an editor calls it — fills each new pixel with a blend of its neighbours. It is the best that can be done without guessing, and it is honest in one way: it adds no false detail. It also adds no real detail.
Below is one design exported twice. Both images are exactly 680 × 300 pixels and would "measure" the same DPI at any print size. The only difference is the size each was exported at.
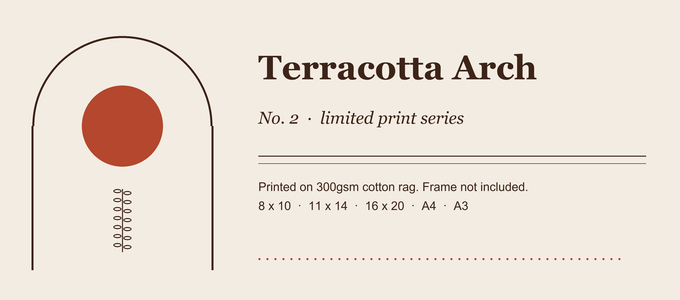
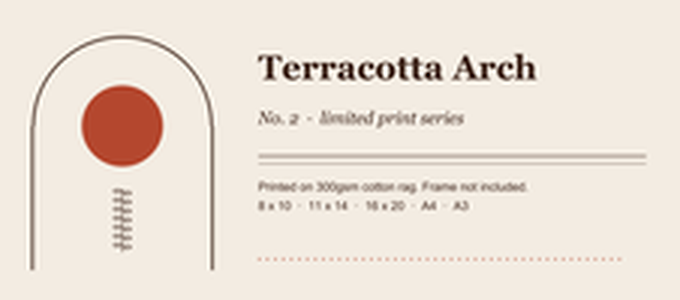
That softness is what a buyer sees when they print an upscaled file at the size its arithmetic promised.
What about AI upscaling?
AI upscalers work differently. Instead of blending neighbours, they predict what detail plausibly belongs there, from patterns learned on other images. The result can look noticeably sharper than ordinary upscaling. But the new detail is a prediction, not your design, and predictions go wrong in characteristic places — Canva's own help page for its upscaler says results "may vary, especially for images with faces or text".
The same page caps upscaled images at 50 megapixels. A 24 × 36 inch print at 300 DPI is 7,200 × 10,800 pixels — 77.8 megapixels — so even that route stops short of the largest poster sizes.
None of this makes AI upscaling useless. It makes it something to inspect, closely, before a buyer prints it — not something to trust because a file now says 300 DPI.
The better fix for Canva designs: export bigger
Text and shapes in a design are drawing instructions, not pixels, so a design tool can draw them at any size you ask for. A bigger download is therefore real detail — the opposite of upscaling. Photos placed in the design are the exception: Canva's help page on blurry downloads notes that low-quality images will still look blurry even in a print PDF.
- On a paid Canva plan, the Download panel's Size option exports a PNG at up to 3.125× the design's dimensions, according to Canva's help centre. For a 24 × 36 inch print at 300 DPI (7,200 × 10,800 px), make the design a third of that — 2,400 × 3,600 px — and download at 3×.
- On the free plan, the download is the size of the design, so the design itself has to be big enough. Canva lists a maximum design size of 8,000 × 3,125 px, which rules out the largest posters at 300 DPI this way.
You can check the difference yourself in under a minute: download the same design at 1× and at 3×, open both, and zoom in on the smallest text.
If you have to upscale anyway
Sometimes the original is gone and upscaling is the only option. Then:
- Start from the largest version of the file you have, and upscale it once.
- Look at the result at 100% zoom — small text and thin lines first, faces if there are any.
- Offer it at the sizes where it still holds up, not the biggest size the arithmetic allows.
Questions
Can I tell whether a file has been upscaled?
Not from its numbers: an upscaled file has the same kind of pixel count and DPI label as one exported at full size. Zoom to 100% and look at text and thin lines. Ordinary upscaling shows as softness; AI upscaling tends to show as detail that looks plausible but is subtly wrong.
Does setting the DPI to 300 in an editor fix it?
No. Changing the DPI label without resampling changes no pixels, and changing it with resampling is upscaling by another name. The 96 DPI article explains the label.
Know the largest size your file can honestly print
Frameproof reads your design's real pixel size and tells you the largest print it can fill at 300 DPI. It builds every size up to that and stops; it will only upscale if you tick a box that says so. The report is free, runs in your browser, and your artwork never leaves your computer.
Check your design free The report is free forever. Building a full print bundle is the paid part.